Are pesky holes in your carpet driving you crazy? Don’t fret! We’ve got you covered with our step-by-step guide on how to patch a hole in your carpet. Whether it’s caused by an accidental spill, unruly pets, or general wear and tear, we understand the frustration of staring at an eyesore every day. But fear not – this easy-to-follow tutorial will have your carpet looking as good as new in no time! So grab your tools and let’s dive into the world of DIY carpet repair in Geelong.
Introduction to Carpet Repair
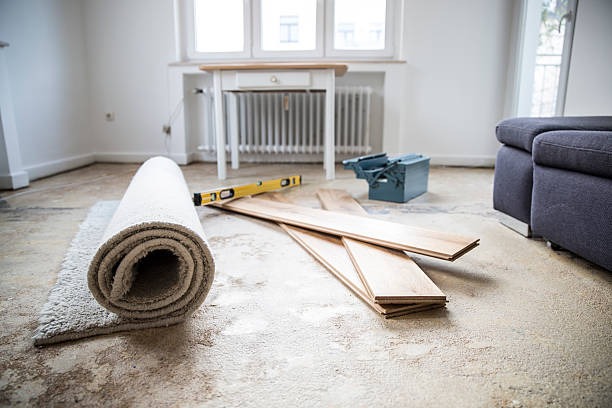
Carpets are an essential part of our homes, providing warmth, comfort, and aesthetic appeal. However, over time, they can become damaged due to heavy foot traffic, furniture movement, or accidents such as spills or burns. One of the most common types of carpet damage is holes or tears. These unsightly holes not only ruin the appearance of your carpet but can also lead to further damage if left unattended.
Understanding the Different Types of Holes in Carpets
Carpets can add warmth and comfort to any room, but unfortunately, they are also prone to damage. One common issue that homeowners may face is the appearance of holes in their carpets. These holes can be caused by a variety of factors such as furniture legs, pet claws, or even wear and tear over time. In this section, we will take a closer look at the different types of holes that can occur in carpets and understand what causes them.
1. Snags:
Snags are one of the most common types of holes found in carpets. They occur when a looped strand of yarn gets pulled out from its position, leaving behind a visible hole. This can happen due to sharp objects like high heels or pet claws getting caught in the carpet fibers. Snags are usually small and can easily be fixed with a simple patching technique.
2. Burns:
Burns are another type of hole that can cause major damage to carpets. These holes occur when an object with heat or fire comes into contact with the carpet surface, causing it to melt or burn away some fibers. Cigarette ash, hot irons, and candles are all potential culprits for causing burns on your carpet. Depending on the severity of the burn, it may require professional repair services.
3. Torn or Ripped:
Tears or rips in carpets usually occur due to heavy traffic areas where there is constant movement over time. This type of damage is more commonly seen in high-traffic areas like
Step 1: Prepare the Area and Gather Supplies
Before you begin patching a hole in your carpet, it is important to properly prepare the area and gather all necessary supplies. This will ensure that the patch adheres smoothly and seamlessly, creating a professional-looking repair.
Here are the steps to follow for preparing the area and gathering supplies:
1. Remove any furniture or objects from the damaged area: Before starting any repairs, make sure to clear out the space around the hole in your carpet. This will provide you with enough room to work and prevent any obstacles from getting in your way.
2. Vacuum or sweep the area: It is essential to clean up any debris or dirt around the hole before proceeding with repairs. Use a vacuum cleaner or broom to remove any loose particles from both sides of the carpet.
3. Cut away frayed edges: If your carpet has frayed edges around the hole, use a pair of scissors to trim them off carefully. This will prevent them from getting caught on your tools during patching.
Step 2: Cut Out the Damaged Section of the Carpet
After assessing the extent of the damage and gathering all necessary materials, it’s time to start repairing your carpet. The first step in this process is to cut out the damaged section of carpet.
1. Gather Your Tools
Before you begin cutting, make sure you have all the necessary tools on hand. These include a utility knife or carpet cutter, a straight edge, and a cutting mat or cardboard to protect your flooring underneath.
2. Mark the Area to Be Cut
Using a marker or chalk, carefully outline the area that needs to be removed. This will serve as a guide for your cutting and ensure that you don’t end up with a larger hole than intended.
3. Secure the Carpet
To prevent any shifting while cutting, secure the surrounding edges of the carpet with heavy objects such as books or furniture.
4. Make Your First Cuts
Using your utility knife or carpet cutter, make diagonal cuts along each corner of your marked area. Be sure to cut through both layers of carpet – the top layer as well as the padding underneath.
5. Cut Out Small Sections at a Time
It’s important not to rush this step and try to cut out large sections at once. Instead, work in small sections at a time until you’ve completely removed the damaged portion of the carpet.
Step 3: Measure and Cut a Replacement Patch
Once you have prepared the damaged area by removing any debris and trimming loose fibers, it is time to measure and cut a replacement patch. This step involves carefully measuring the size of the hole or damage in your carpet, cutting out a new piece of carpet to fit that exact size, and then securing it in place.
Instructions:
1. Measure the damaged area: Begin by using a measuring tape to determine the size of the damaged area on your carpet. Take precise measurements of both length and width, as well as any irregularities in shape.
2. Choose a replacement patch: You can either use a remnant piece of carpet from an inconspicuous area, such as under furniture or purchase a small piece of matching carpet from a home improvement store. Make sure that the new patch matches the texture and color of your existing carpet for a seamless repair.
3. Place the patch over the damaged area: Lay down the replacement patch over the damaged area, making sure it covers at least an inch beyond all sides of the hole. Use markers or chalk to trace around its edges onto your existing carpet.
4. Cut out the traced shape: Using sharp scissors or a utility knife, carefully cut along your traced outline to remove the damaged portion of your carpet.
Step 4: Attach the Patch to the Carpet Using Adhesive or Tape
Once you have prepared the hole in your carpet and cut out a patch to fit, it’s time to attach the patch to the carpet. There are two main methods for attaching a patch: using adhesive or tape.
1. Using Adhesive:
a) Choose an appropriate adhesive: When it comes to adhesives, there are several options available such as glue, carpet seam adhesive, or double-sided carpet tape. It is important to choose an adhesive that is strong enough to hold the patch in place but also safe for use on carpets.
b) Apply the adhesive: If you are using glue, apply a thin layer around the edges of the hole and on the backside of the patch. Make sure not to use too much as it can seep through and create a mess. For carpet seam adhesive or double-sided tape, simply follow the instructions provided by the manufacturer.
c) Place and press: Carefully place the patch over the hole and press down firmly to ensure it adheres properly. Use a rolling pin or similar tool to smooth out any air bubbles or creases.
d) Let it dry: Depending on the type of adhesive used, allow sufficient time for it to dry completely before moving on to step 5.
Step 5: Trim any Excess Fibers
After completing the previous steps of patching a hole in your carpet, it is important to trim any excess fibers that may be sticking out around the patched area. This will help give your carpet a clean and seamless appearance.
To begin, gather a pair of sharp scissors or a utility knife. Carefully inspect the patched area and identify any loose or frayed fibers that are protruding from the edges.
Using your scissors or utility knife, carefully trim these excess fibers flush with the rest of the carpet. Be sure to cut as close to the base of the carpet as possible without damaging it.
For longer carpet fibers, you may need to use tweezers to pull out individual strands before trimming them. This will help prevent any noticeable gaps in the carpet once trimmed.
Take care not to pull on or tug at the patched area while trimming as this can cause further damage and unraveling of the patch.
If there are still some stubborn loose fibers after trimming, you can gently brush over them with a soft-bristled brush to blend them in with the surrounding fibers.